Of all the feelings that define a life in motion, few are as specific as the quiet, creeping anxiety of a visa deadline. It’s a date on a calendar that feels less like a reminder and more like a countdown. A gentle but firm tap on the shoulder from the world, saying, “Time’s almost up.”
When I first arrived in the Philippines, that 30-day stamp in my passport felt like a generous gift. A month in paradise! But a month melts away quickly here. It dissolves into the heat of the afternoon, into conversations that last until sunset, into entire days spent just watching the sea. Soon, that 30-day mark starts to look less like a finish line and more like a starting pistol.

The most common question I get from fellow travelers who are falling in love with this place is filled with that same anxiety: “But how do you stay? What happens after the first month?”
So, let’s take a deep breath. Let’s talk about the art of staying. This is your human, step-by-step guide to navigating the Philippine tourist visa extension process. It’s not just a bureaucratic task; it’s a local rite of passage. It’s the small, recurring ritual that earns you more time in this incredible archipelago.
First, The Basics: Your First 59 Days of Grace
For most nationalities, you arrive and are granted a 30-day visa-free stay. Before that first month is up, you’ll need to make your first visit to a Bureau of Immigration (BI) office for an extension.
This first one is the easiest. You are simply applying for your first 29-day extension, which brings your total legal stay to 59 days. This is a standard, straightforward process and gets you comfortable with how the system works. After this, you enter the rhythm of regular extensions.
Entering the Rhythm: The Step-by-Step Extension Process
Once you’re past the 59-day mark, you can typically extend for one month, two months, or even six months at a time (though the six-month option is not always available and is much more expensive). For most of us living here, the one or two-month extension is the standard beat.
Here is the dance, step-by-step.
Step 1: Arrive Early and Dress the Part
This is not a suggestion; it’s the golden rule. Immigration offices, especially in big cities, get busy. Arriving 15 to 30 minutes before they open can be the difference between a one-hour visit and a four-hour ordeal. Also, treat it with a little respect. This is a government office. Leave the beach attire behind. Wear pants or a skirt, a decent shirt, and closed-toed shoes. You’ll be taken more seriously, and you won’t risk being turned away for a dress code violation (yes, it happens).

Step 2: Get the Application Form
As you enter, you’ll see a small forms station or a window. Ask for the Tourist Visa Extension form (sometimes labeled R.P. 562). It’s a simple, one-page document. Find a seat and fill it out clearly. You’ll need basic information: your name, passport number, and your address in the Philippines. For your address, the name of your hotel or condo is perfectly fine.
Step 3: The Photocopy Dance
You will need photocopies. You’ll almost always need a copy of your passport’s main bio page and a copy of the page with your latest visa stamp. Most immigration offices have a small photocopy shop inside or right next door. They know exactly what you need. It’s a small, expected part of the process.
Step 4: Submit, Smile, and Wait
Take your completed form, your passport, and your photocopies to the receiving window. The officer will glance over your documents to make sure everything is in order. They will then give you a number and tell you to wait.
And now, you wait. This is your moment to practice patience. Bring a book, have a podcast downloaded, or just observe. There’s a strange sense of community in these waiting rooms, a mix of foreigners from all over the world, all there for the same reason: to buy a little more time.
Step 5: Pay the Piper
Your number will be called, and you’ll head to the cashier’s window to pay the fees. Hand over your payment, and be sure to get a receipt. Always, always keep your receipt.
Step 6: The Final Stamp
After another short wait, your name will be called one last time. You’ll go to a final window where they will hand you back your passport, now containing a fresh new stamp and a sticker. That’s it. You’re done. That feeling of walking out of the office, passport in hand, with another month or two of freedom is a feeling of pure relief.

Your Toolkit: The Documents You’ll Absolutely Need
Keep it simple. Don’t show up with a folder full of unnecessary papers.
- Your Passport: It must be valid for at least six months beyond your intended stay.
- Completed Application Form: Filled out neatly.
- Photocopies: Of your passport bio page and your most recent visa/arrival stamp page.
- Your ACR I-Card (After the First 59 Days): The Alien Certificate of Registration Identity Card is required for any visitor staying longer than 59 days. You apply for this at the Bureau of Immigration during one of your extension visits. It’s a one-time application (renewed annually) that costs around $50 USD plus fees, and it’s a mandatory part of staying here long-term.

The Price of Paradise: Understanding the Fees
This is where things can get confusing, as the cost is not always the same. The price for your Philippine visa extension can vary depending on the office, the length of the extension, and whether you opt for “express lane” fees (which are often mandatory).
As a rough guide, expect a two-month extension to cost somewhere between 4,000 and 6,000 PHP. Your very first extension (to get to 59 days) is cheaper, usually around 2,000 to 3,000 PHP. The costs cover a visa fee, an application fee, and sometimes other small charges. Just accept it as part of the cost of living.
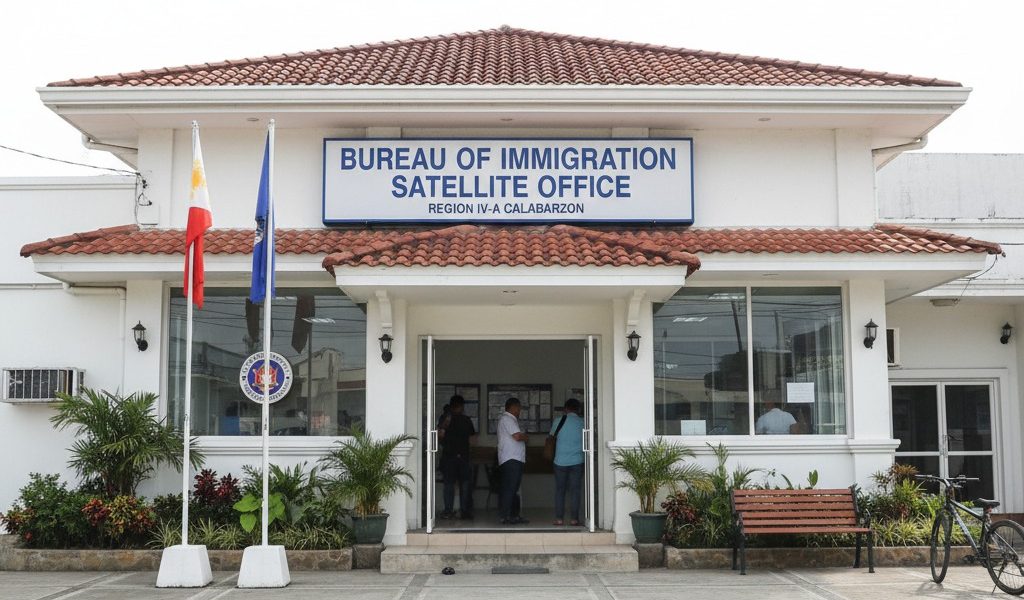
Finding Your Sanctuary: Bureau of Immigration Locations
While the main BI office is in Intramuros, Manila, I highly recommend avoiding it if you can. It’s known for being incredibly busy. Almost every major city and many smaller towns have a satellite office.
Your best bet is to search on Google Maps for “Bureau of Immigration” near your location. Smaller, regional offices in places like Dumaguete, Cebu, or even mall-based offices are often far more efficient and pleasant to deal with.
Pro-Tips for a Smooth Experience
- Patience and a Smile are Your Superpowers: This is the most important tip. The officers are often dealing with a high volume of people. A little bit of kindness, a genuine “Salamat po” (thank you), and a patient attitude will make your experience a thousand times better. You are a guest in their country. Act like it.
- Bring a Pen: A simple, black pen. You’d be surprised how often you’ll need it and how hard it can be to find one.
- Keep Your Receipts: Keep all your official receipts from every extension in your passport. They are your proof of legal stay.
- The ACR I-Card is Non-Negotiable: Don’t try to avoid getting your ACR I-Card. It’s a requirement, and failing to get it will lead to much bigger headaches and fines down the road.
A Note on Agents and Insurance
You will see “visa agents” or “fixers” offering to handle the process for you for a fee. For a standard tourist visa extension, I honestly believe it’s unnecessary. Doing it yourself teaches you how the system works and connects you more deeply to the reality of living here.
What is non-negotiable, however, is travel insurance. Life is unpredictable. Accidents happen. The peace of mind that comes from knowing you’re covered in an emergency is priceless. Services like SafetyWing are popular among long-term travelers because they operate on a monthly subscription basis and offer reliable coverage. It’s the one piece of “bureaucracy” I’m more than happy to pay for.
More Than Just a Stamp
In the end, extending your visa is more than just a transaction. It’s a reaffirmation of your choice to be here. Each stamp in your passport tells a story. It’s a chapter you chose to write, a month you chose to live, a memory you chose to make.
So don’t fear the process. Embrace it as part of the journey. It’s the small price we pay for the privilege of calling this paradise home, even if it’s just for a little while longer.

famotidine dementia
famotidine dementia
dutasteride minoxidil progress
dutasteride minoxidil progress
sémaglutide effets indésirables
sémaglutide effets indésirables
semaglutid köpa online sverige
semaglutid köpa online sverige
semaglutid tabletten kaufen
semaglutid tabletten kaufen
tab topiramate moa
tab topiramate moa
propecia 1mg maroc
propecia 1mg maroc
sildenafil dosage how long does it last
sildenafil dosage how long does it last
hers minoxidil foam
hers minoxidil foam
naltrexone bupropion moa
naltrexone bupropion moa